


ADAS Calibration Service> Vehicle Pre Conditioning - Page 3 of 3
•
We verify the wheel and tire size and ensure the air pressure in the tires are at the placard value.

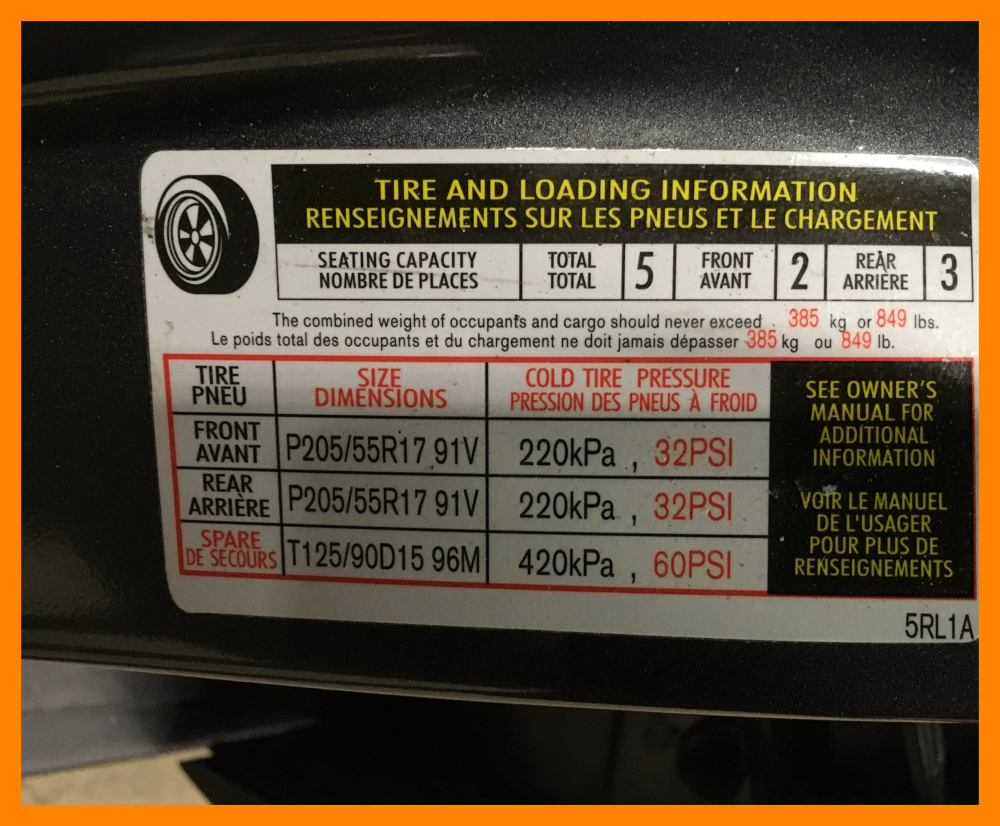
Most
newer
vehicles
have
a
placard
inside
the
driver
door
jamb
opening
that
specifies
the
vehicles
required
tire,
wheel
size
and
air
pressure
values.
Verifying
the
wheel
and
tire
size
along
with
the
correct
tire
pressure
is
one
of
the
key
steps
that
need
to
be
done
prior
to
any
ADAS
system
calibration.
A
tire
set
just
2
psi
to
low
or
high
from
the
recommended
tire
pressure
can
cause
a
camera
to
be
mis-calibrated
by
1
degree
or
possibly
more.
1
degree
doesn’t
sound
like
much
but
when
the
camera
looks
out
at
100
to
300
meters
it’s
more
than
enough
to
make
a
tremendous
difference
in
your
vehicles
automatic
forward
looking braking systems ability to prevent you from getting into an accident.
•
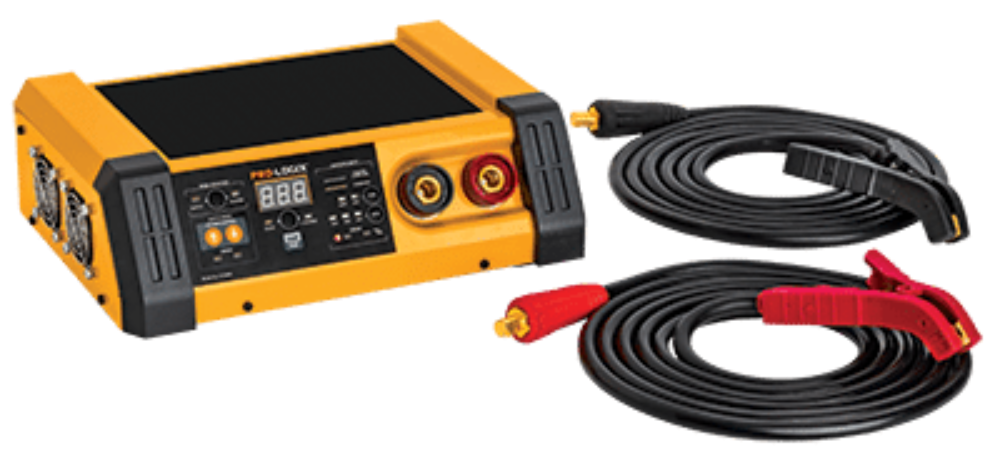
We attach a battery power supply to your vehicle’s battery that supports module
reprogramming.
The
reason
for
this
is
that
during
an
ADAS
windshield
camera
calibration
we’re
actually
programing
one
or
more
of
the
vehicles
computer
modules.
If
the
battery
voltage
is
unstable
or allowed to fall below 12 volts it can cause the windshield camera calibration to fail.

•
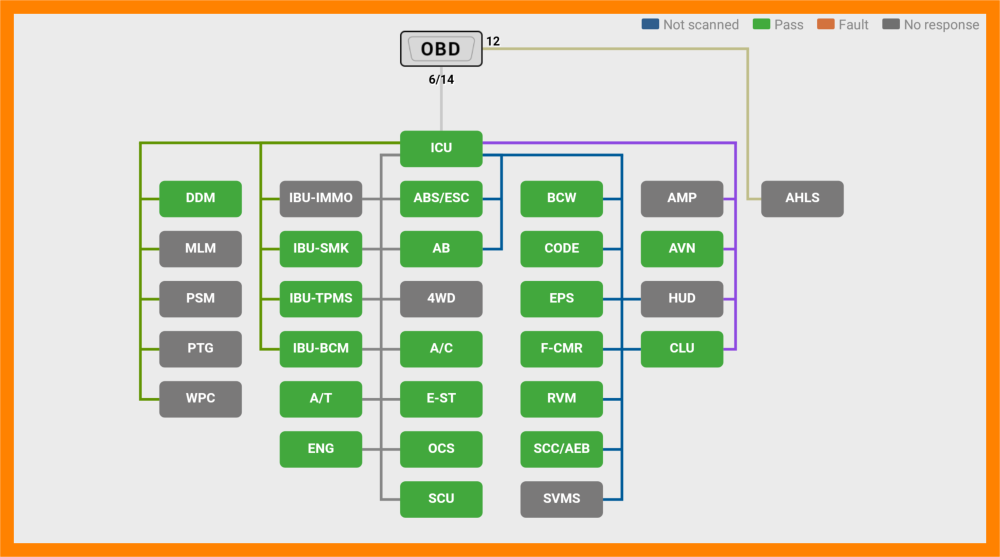
We perform a pre scan of all the electronic systems that are present in your vehicle.
The
pre
scan
will
verify
whether
all
systems
are
fully
functional
as
well
as
identify
any
systems
that
are
not.
This
is
a
very
important
step
in
that
it
identifies
any
pre
existing
issues
that
may
exist
before
any
repair
work
is
done.
In
our
case
if
any
issues
are
found
in
the
ADAS
systems
that
pertain
to
the
repairs
we’re
about
to
perform
we
can
inform
our
customer
so
they
can
be
aware
of
any
and
all
issues
at
the
start
of
the
repair
instead
of
finding
out
later
there
are
problems
that
should
have
been
addressed
prior
to
the
windshield
installation
and
camera
calibration. If the vehicles ADAS systems are good to go we can proceed to the next step.

•
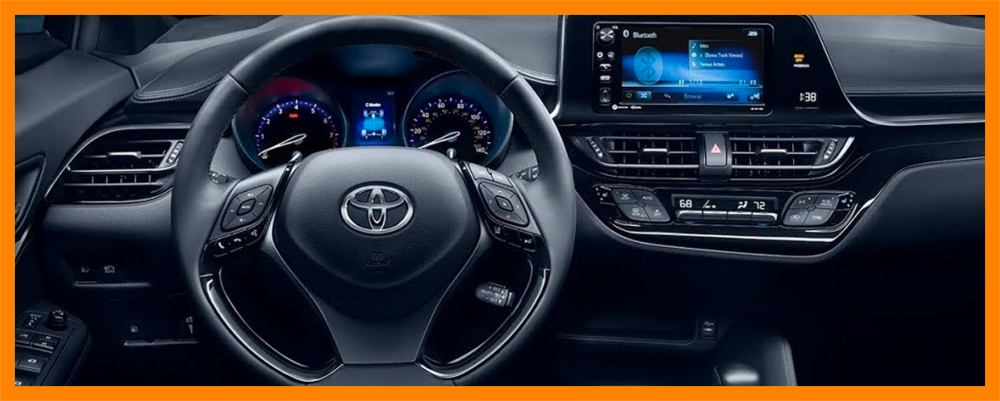
We check that when the steering wheel is straight the steering angle sensor reads 0.0 degrees.
The
windshield
camera
and
the
steering
wheel
sensor
are
the
main
items
the
ADAS
system
in
your
vehicle
uses
for
information
in
order
to
keep
your
vehicle
within
the
lanes
or
alert
you
if
it’s
not
while
your
traveling
down
the
highway.
If
your
steering
wheel
isn’t
in
the
correct
position
when
the
sensor
is
at
0.0
it
indicates
that
something
isn’t
right
with
your
vehicles
wheel
alignment
and
that
needs
to
be
addressed
before
doing
the
calibration
on
the
windshield
camera.
Here
at
Phoenix
Glass
we
also
actually
check
the
wheel
alignment
in
house to verify it’s within tolerances on every ADAS windshield camera calibration we do.

•
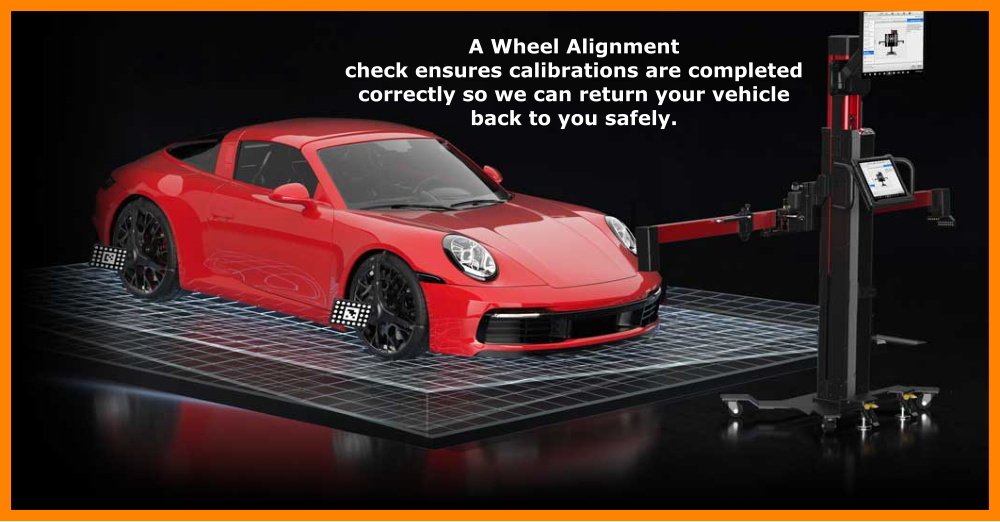
if your specific vehicle requires it we perform a wheel alignment check.
If
the
vehicle
passes
this
check
we
can
move
forward
with
the
windshield
installation
and
camera
calibration.
If
it
doesn’t
pass
the
vehicle
must
undergo
a
wheel
alignment
prior
to
calibrating
the
windshield
camera.
When
that
happens
we
send
the
vehicle
out
to
your
choice
of
alignment
centers.
When
the
vehicle
is
returned
to
us we again perform wheel alignment check
to verify that it was done properly
.
A
dirty
windshield
inside
or
outside
can
impair
the
cameras
view
and
can
cause
the
calibration
procedure
to
fail.
A
bug
smear
on
the
outside
or
a
spider
that
has
made
it’s
way
to
the
camera
portal
to
the
inside.
We
have
seen
something
as
small
as
a
piece
of
lint
laying
on
the
lower
ramp
the
camera
looks
across
cause
issues
during
a
windshield
camera
calibration.
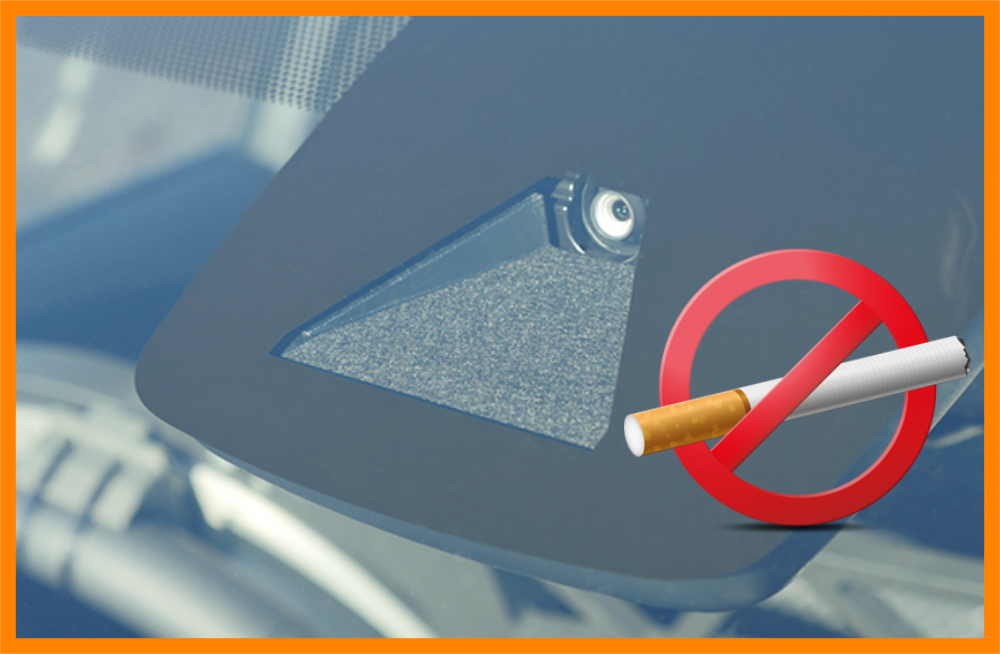
Smoking
in
an
ADAS
equipped
vehicle
is
totally
out
of
the
question.
The
film
smoke
generates
on
the
inside
of
the
windshield
will
absolutely
cause
issues
for
your
ADAS
windshield
camera.
There
are
a
growing
number
of
windshield
camera
mounts
that
are
all
but
impossible
to
clean
even
when
the
camera
is
removed
from
its
mount.
On
those
type
of
mounts
the
only
access
to
clean
the
glass
is
through
the
tiny
hole
the
camera
lens
looks
through.
A
Q-tip
is
the
only
method
we’re
aware
of
and
in
most
cases it leaves lint behind.
•
We check that the windshield is clean, especially at the portal area where the camera looks through the windshield.
•
We check that the front wheels are steering straight ahead.
The
front
wheels
must
be
pointing
straight
ahead
when
the
steering
angle
sensor
is
reading
0.0
during
the
actual
calibration
procedure.
On
most
vehicles
when
the
front
wheels
are
turned
even
a
slight
amount
they
tilt
as
well
as
slightly
move
the
vehicle
off center which can cause a camera mis-calibration.
•
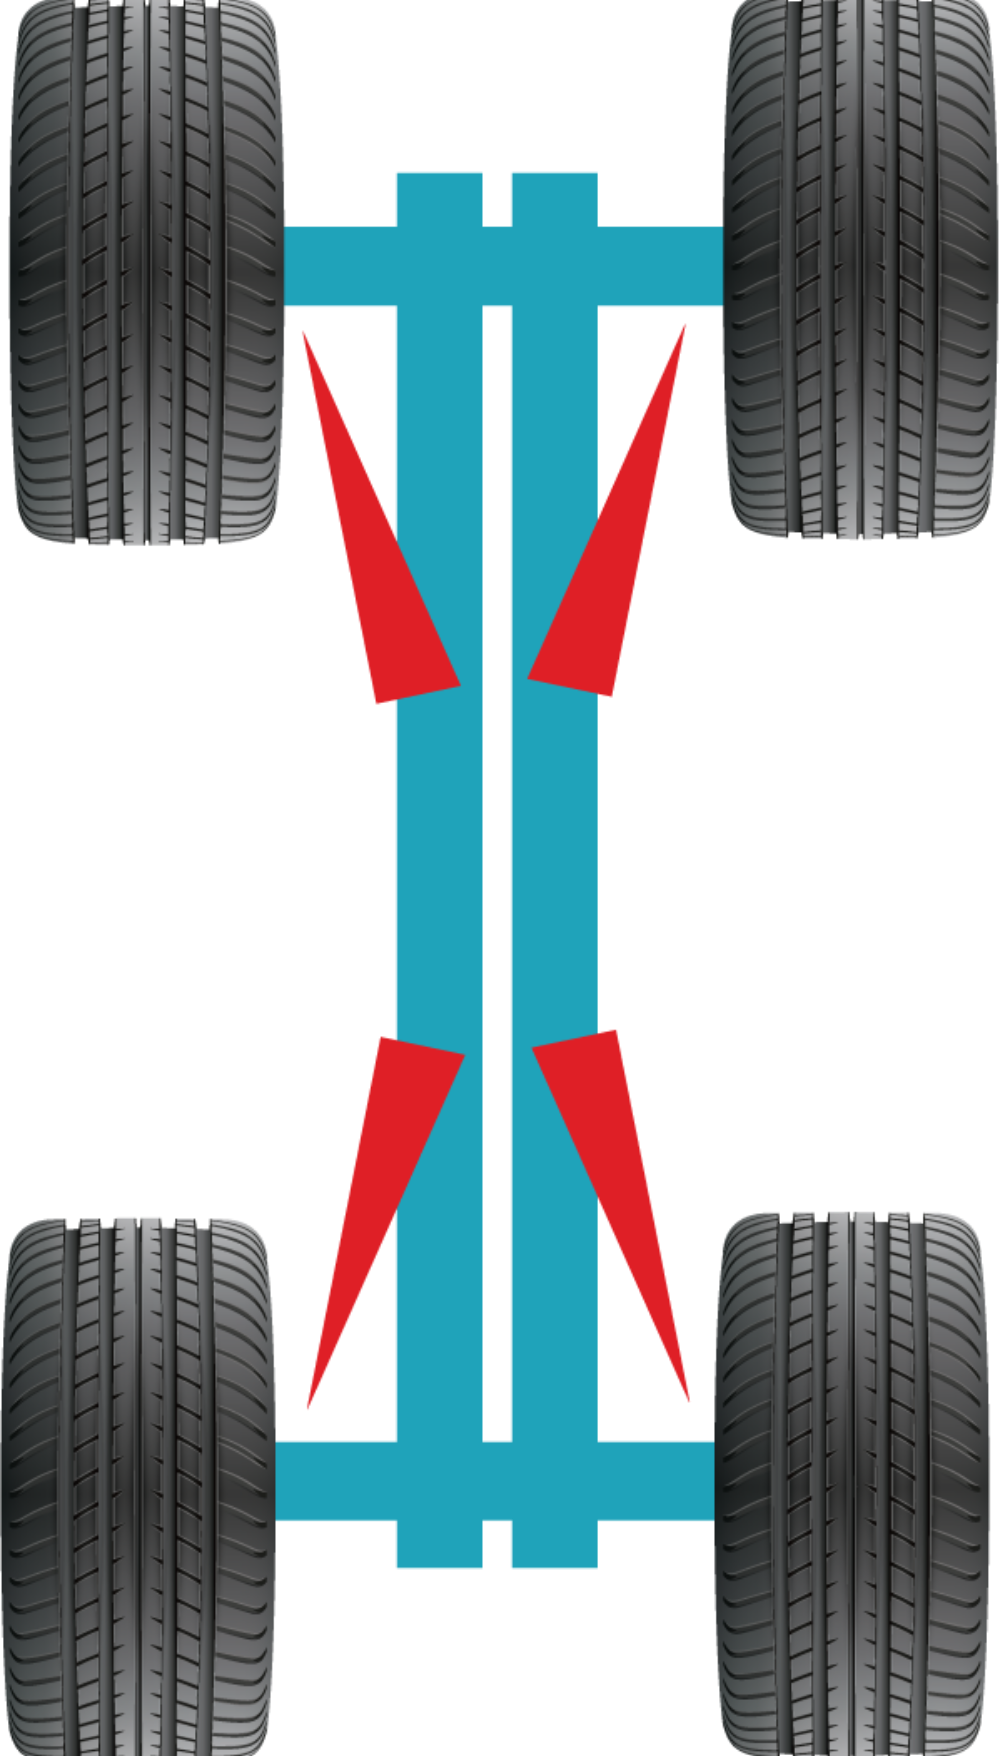
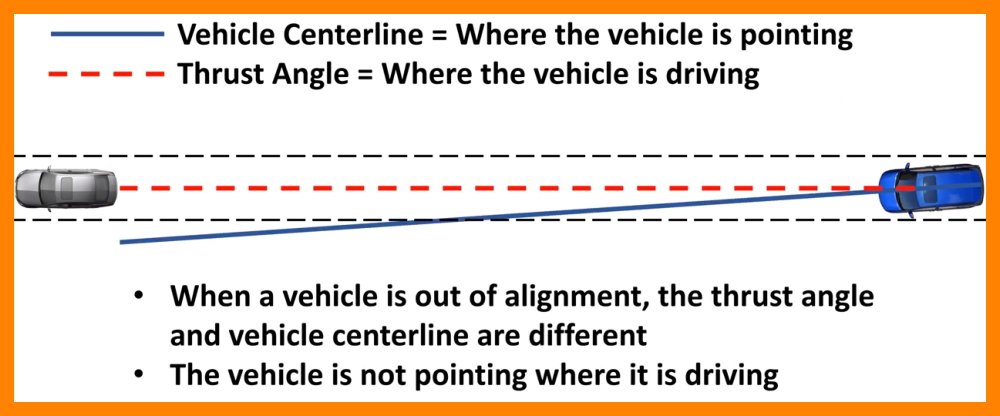
We check that the rear wheels are steering straight ahead
This doesn’t make a lot of sense to most people but if the rear wheels are mis-aligned
it actually changes the track (thrust angle) of the vehicle. We have just about all
been driving down the highway and seen a vehicle that wasn’t tracking correctly down
the road, it’s usually referred to by people as dog tracking. We must also be careful
and check for this option every time because there are currently at least 28 models of
vehicles on the road that can have 4 wheel steering such as :
Acura
RLX,
Acura
TLX,
Audi
A6,
Audi
A7,
Audi
A8,
BMW
5
Series,
BWS
7
Series,
BMW
850
CSi,
Cadillac
CT6,
Chevrolet
Silverado,
Ferrari
812
Superfast,
Ford
F-150
Platinum
ZF,
GMC
Sierra
1500
Denali,
Honda
Prelude,
Lamborghini
Aventador
S,
Lamborghini
Urus,
Lexus
GS,
Lexus
LC
500,
Lexus
LS
500,
Lexus
RC,
Mitsubishi
3000GT,
Mitsubishi
Galant
VR-4,
Mercedes
AMG
GT
R,
Nissan
300
ZX,
Nissan
Skyline
R34 GT-R, Porsche 911, Porsche Cayenne, Porsche Panamera

•
We check that all the exterior lights are off or covered and that all doors are closed during the
ADAS windshield camera calibration procedure.
The reason for this is the head lights as well as LED running lights can cause a glare on the
calibration targets that can cause the calibration to fail. Any open doors will cause the vehicle to
lean causing an inaccurate calibration.

•
We prepare the calibration area by:


Copyright 2013 © Phoenix Glass, Inc. All Rights Reserved
Revised June 2023
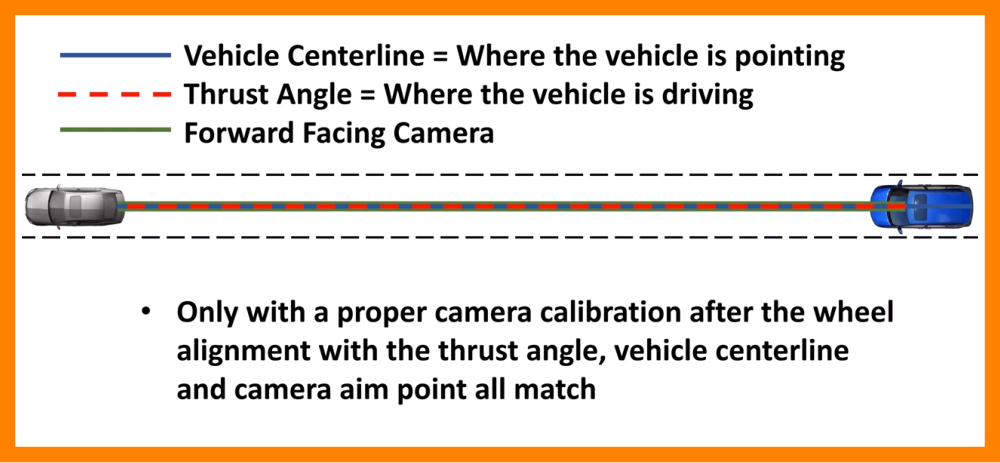
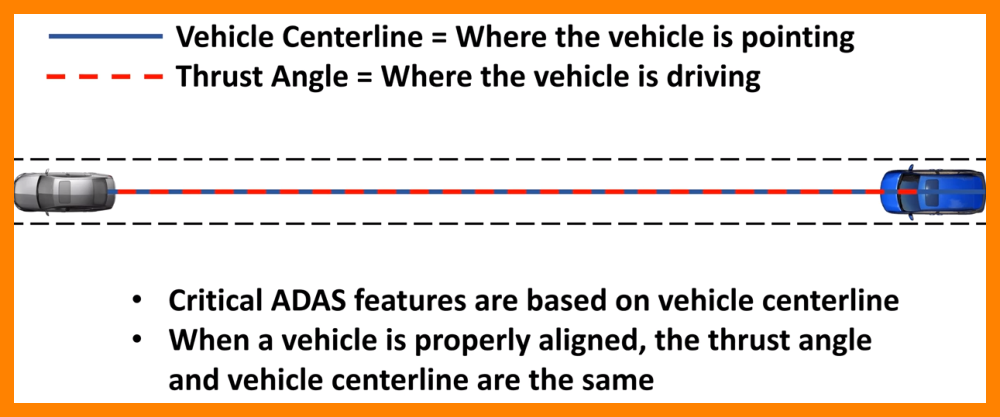
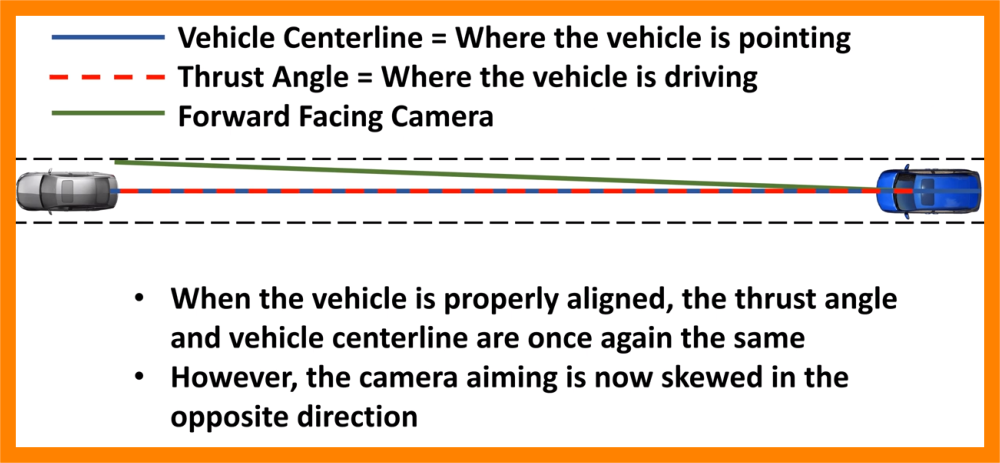
The
reason
we
perform
this
check
is
that
when
your
windshield
camera
is
properly
calibrated
it
is
lined
up
with
the
vehicles
center
line.
If
the
vehicle
isn’t
tracking
properly
when
your
driving
down
the
road
the
camera
won’t
be
looking
straight
ahead,
it
will
be
looking
at
where
the
center
line
of
the
car
is
pointed
and
the
ADAS
system will not be able to perform properly.


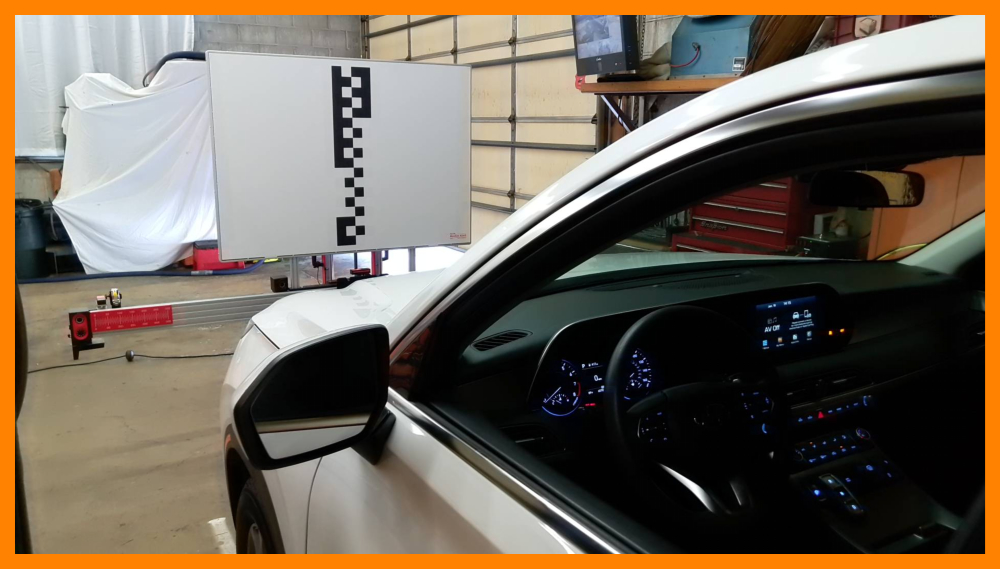
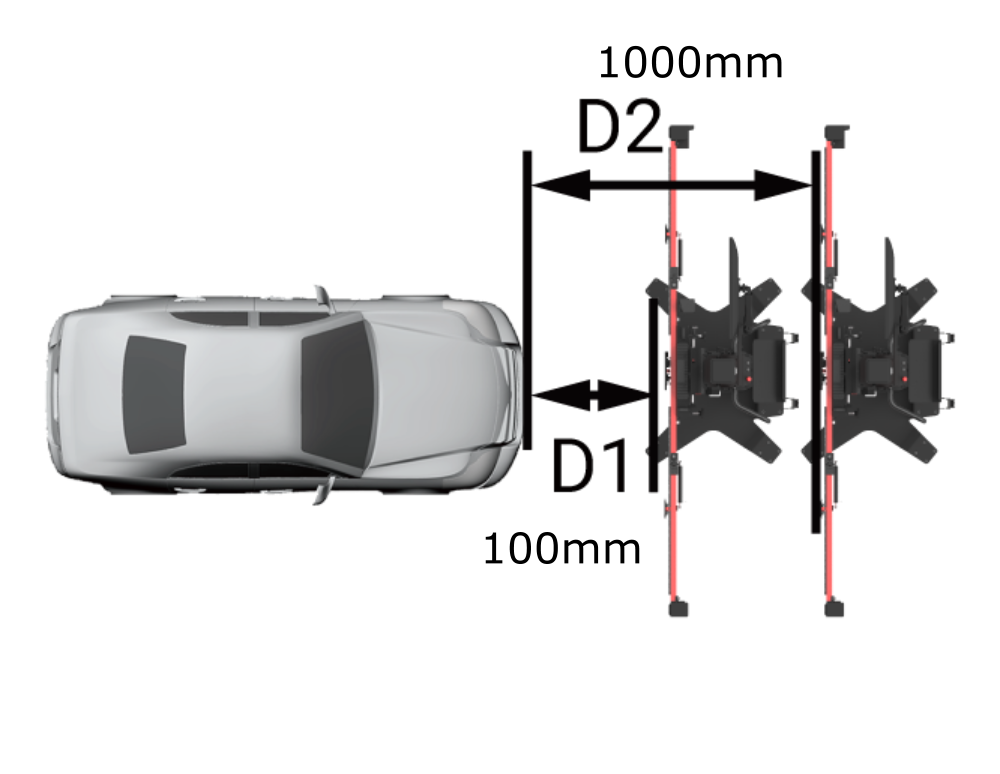
Static calibration
To
perform
a
Static
Calibration
on
this
particular
car
it
is
required
that
the
ADAS
target
be
placed
in
two
different
exact
positions
in
front
of
the
vehicle.
The
first
position
is
at
100mm
and
then
the
target
is
moved
to
the
second
position
at
1000mm.
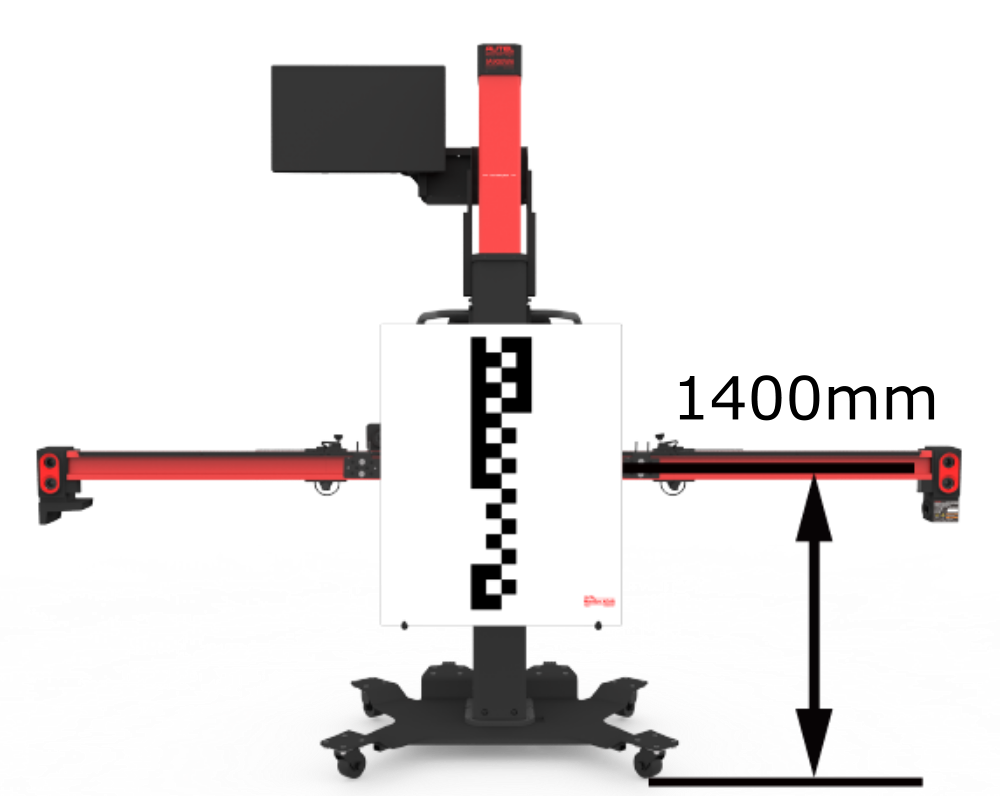
Both
locations
required
the
ADAS
target
to
be
exactly 1400 mm from the floor during the windshield camera calibration.
This concludes the vehicle pre conditioning requirements
We have went this far so we might as well go ahead and explain the rest of the procedures
•
Making sure the area is well and evenly lit.
•
We close all bay doors and cover all windows so outside light doesn’t cause any glares or
reflections on the ADAS targets or on the vehicles windshield. Not especially fun on hot summer
days.
•
We must also cover any objects in the area that may interfere with the cameras view.

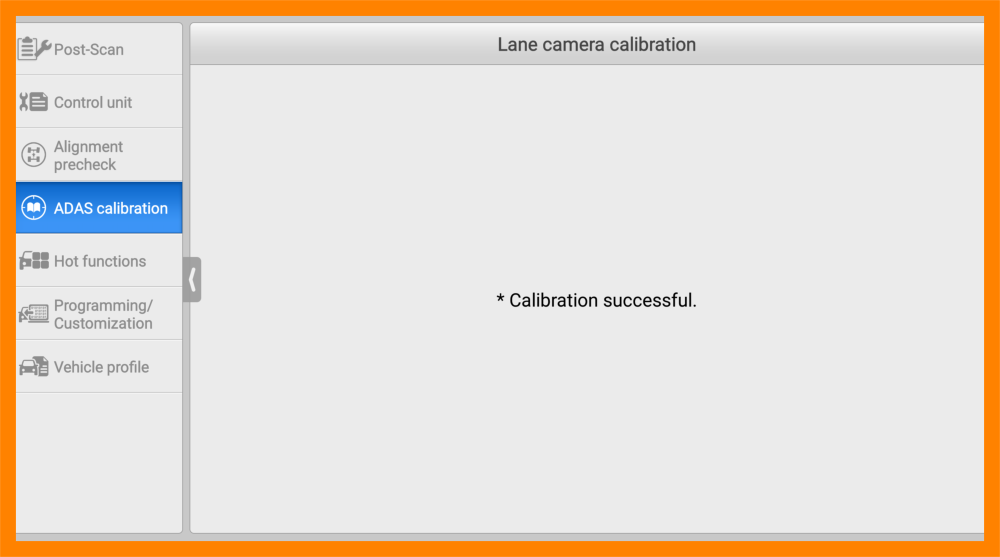
It is very possible for a Calibration Technician to skip several of the vehicle pre conditioning instructions and procedures
and still obtain a Successful calibration acknowledgement from the ADAS equipment the person is using, it’s done all the time.
If even one of the steps we have listed are passed over and not followed
The End Result Will Undoubtedly Be A Mis-Calibration.
The only way to achieve A Truly Accurate Successful Calibration is by following the manufacturer’s
vehicle pre conditioning instructions and procedures to the letter.


Please Like Us
on Facebook
We
made
this
video
to
demonstrate
just
what
can
happen
if
this
step
is
not
performed.
It
will
show
you
the
affect
the
tire
pressure
has
on
the
calibration
of
the
windshield
camera
as
well
as
radar
and
sonar
sensors
used
in
your
vehicles
safety
systems.
We
did
it
showing
what
happens
at
5
psi
and
again
at
10
psi.
We
also
only
changed
the
tire
pressure
on
the
left
front
tire
of
the
vehicle.
You
can
also
see
how
the
Laser
moves
not
only
up
and
down
but
also
moves
left
and
right
as
the
pressure
changes.
Just
imagine if all four tires had varied pressures what you could end up with.

Hopefully these ADAS Calibration pages have been informative for you.
No
matter
who
you
choose
to
have
your
vehicle’s
ADAS
systems
calibrated
by,
hopefully
armed
with
the
knowledge
on
these
pages
you
will
be
able
to
make
the
right
decision.
There
are
several
different
brands
of
calibration
equipment
on
the
market.
Some
are
complex
and
some
are
less
difficult
than
others
to
work
with
but
in
the
end
they
all
do
the
same
job.
The
one
thing
they
all
have
in
common
is
that they all start out by following the Vehicle Pre Conditioning Requirements that are set forth by the automotive manufacturers.
If you’re not asked to remove all objects from the vehicles interior prior to a calibration that’s the first red flag.
If you are not asked to have your fuel tank filled prior to a calibration that’s the second red flag.
At that point you will know if you’re in the right place or not.
Dynamic Calibration
•
The Dynamic portion of the calibration for this particular car requires driving the vehicle
•
We must select a road that has fixed reference objects on both sides
•
The vehicle is driven at a constant speed within the specified ranges required until our diagnostic tool prompts us that the dynamic
calibration is complete and successful. At that point we return to our service center and remove our equipment from the vehicle.
This vehicle required both a Static and a Dynamic Calibration
•
Our next and final step is to take the vehicle on a test drive to ensure that the ADAS systems we calibrated performs properly
On a final note you should know that….


